Fully Managed Users
Use Roled’s complete authentication solution. Users log in through Roled’s hosted page with email and password. This guide implements OAuth 2.0 Authorization Code Flow with PKCE for secure, browser-based authentication.
What you’ll build
| Step | Outcome |
|---|---|
| 1 | Configure project with redirect URI |
| 2 | Start OAuth flow from your app |
| 3 | Handle callback and exchange authorization code for tokens |
| 4 | Use access token to call protected endpoints |
| 5 | Implement refresh token flow |
| 6 | Implement secure logout with token revocation |
Prerequisites
- A Roled Console account with a project created (see Project Setup)
- A local app running on
http://localhost:4000(or your domain)
1. Configure redirect URI
Configure where Roled should send users after they authenticate successfully.
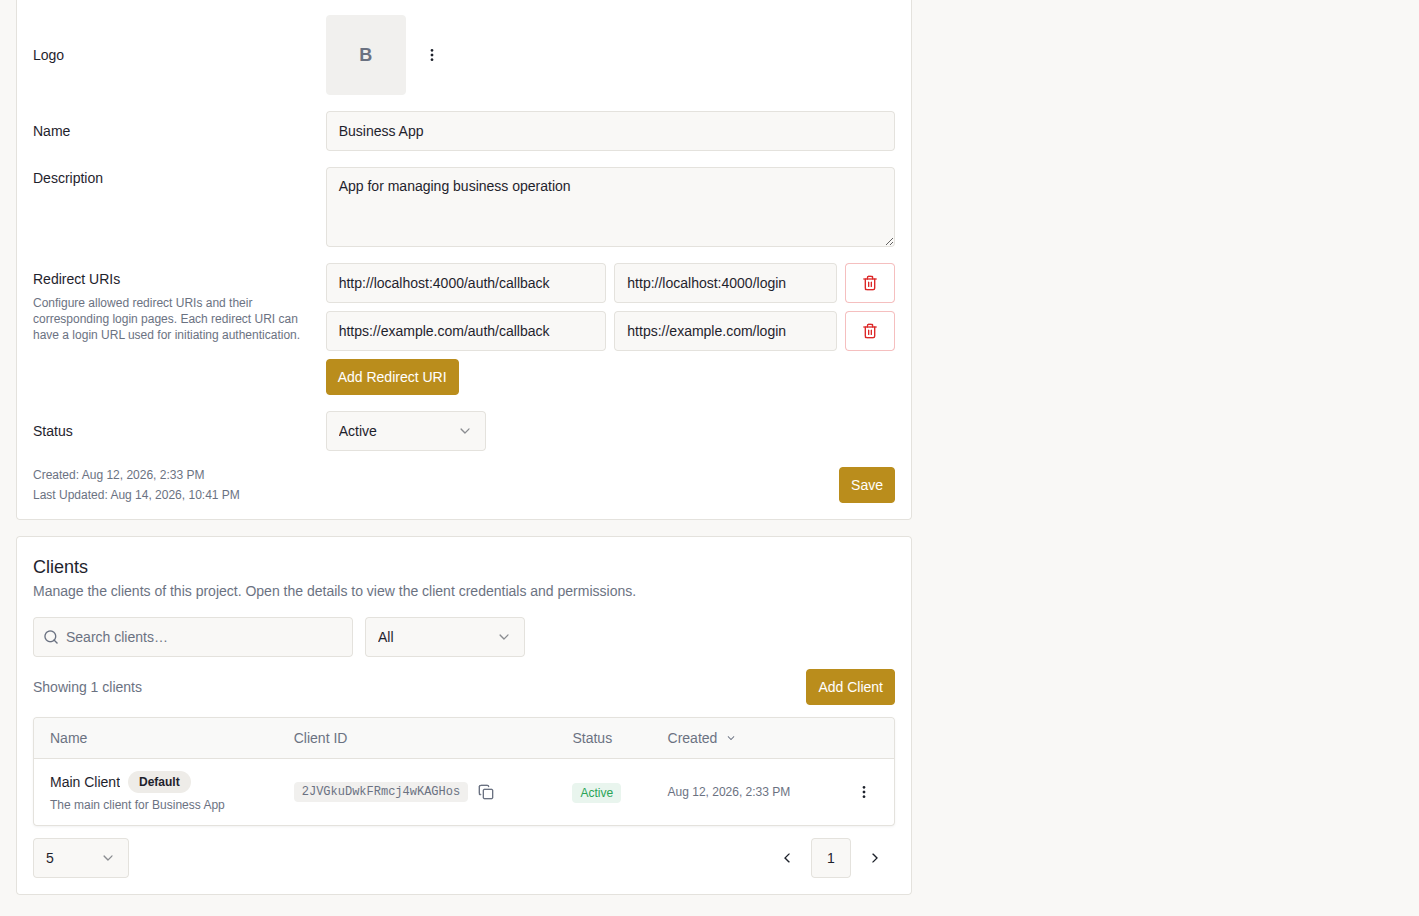
Open your Business App project in Roled Console.
Under Redirect URIs, add your application’s callback URL:
- Development:
http://localhost:4000/auth/callback - Production:
https://example.com/auth/callback
- Development:
Click Save.
Copy your Client ID from the Clients section, you’ll need it for the OAuth flow.
2. Initiate the OAuth flow
Roled requires PKCE (Proof Key for Code Exchange) for all Authorization Code flows to prevent authorization code interception attacks. Your application must:
- Generate a random
code_verifier(43–128 URL-safe characters) - Compute
code_challenge = Base64URL(SHA-256(code_verifier)) - Store both
code_verifierand a randomstatevalue for validation - Redirect the user’s browser to Roled’s authorization endpoint
Run this JavaScript in the browser when users click Login:
const ROLED_AUTH_URL = 'https://auth.roled.io/authorize';
const CLIENT_ID = '2JVGkuDwkFRmcj4wKAGHos'; // from Roled Console
const REDIRECT_URI = 'http://localhost:4000/auth/callback';

function base64UrlEncode(bytes) {
  let binary = '';
  for (const byte of bytes) {
    binary += String.fromCharCode(byte);
  }
  return btoa(binary)
    .replace(/\+/g, '-')
    .replace(/\//g, '_')
    .replace(/=+$/, '');
}

function generateCodeVerifier() {
  const bytes = new Uint8Array(32);
  crypto.getRandomValues(bytes);
  return base64UrlEncode(bytes);
}

async function generateCodeChallenge(codeVerifier) {
  const digest = await crypto.subtle.digest(
    'SHA-256',
    new TextEncoder().encode(codeVerifier)
  );
  return base64UrlEncode(new Uint8Array(digest));
}

async function loginWithRoled() {
  const codeVerifier = generateCodeVerifier();
  const codeChallenge = await generateCodeChallenge(codeVerifier);
  const state = generateCodeVerifier();

  // Store for the callback handler
  sessionStorage.setItem('roled_code_verifier', codeVerifier);
  sessionStorage.setItem('roled_oauth_state', state);

  const params = new URLSearchParams({
    client_id: CLIENT_ID,
    redirect_uri: REDIRECT_URI,
    response_type: 'code',
    code_challenge_method: 'S256',
    code_challenge: codeChallenge,
    state: state,
  });

  window.location.href = `${ROLED_AUTH_URL}?${params.toString()}`;
}

// Attach to your login button
document.getElementById('login-button').addEventListener('click', loginWithRoled);
This redirects users to a URL like:
https://auth.roled.io/authorize
  ?client_id=2JVGkuDwkFRmcj4wKAGHos
  &redirect_uri=http://localhost:4000/auth/callback
  &response_type=code
  &code_challenge_method=S256
  &code_challenge=E9Melhoa2OwvFrEMTJguCHaoeK1t8URWbuGJSstw-cM
  &state=xcoiv98y2kd22vusuye3kch
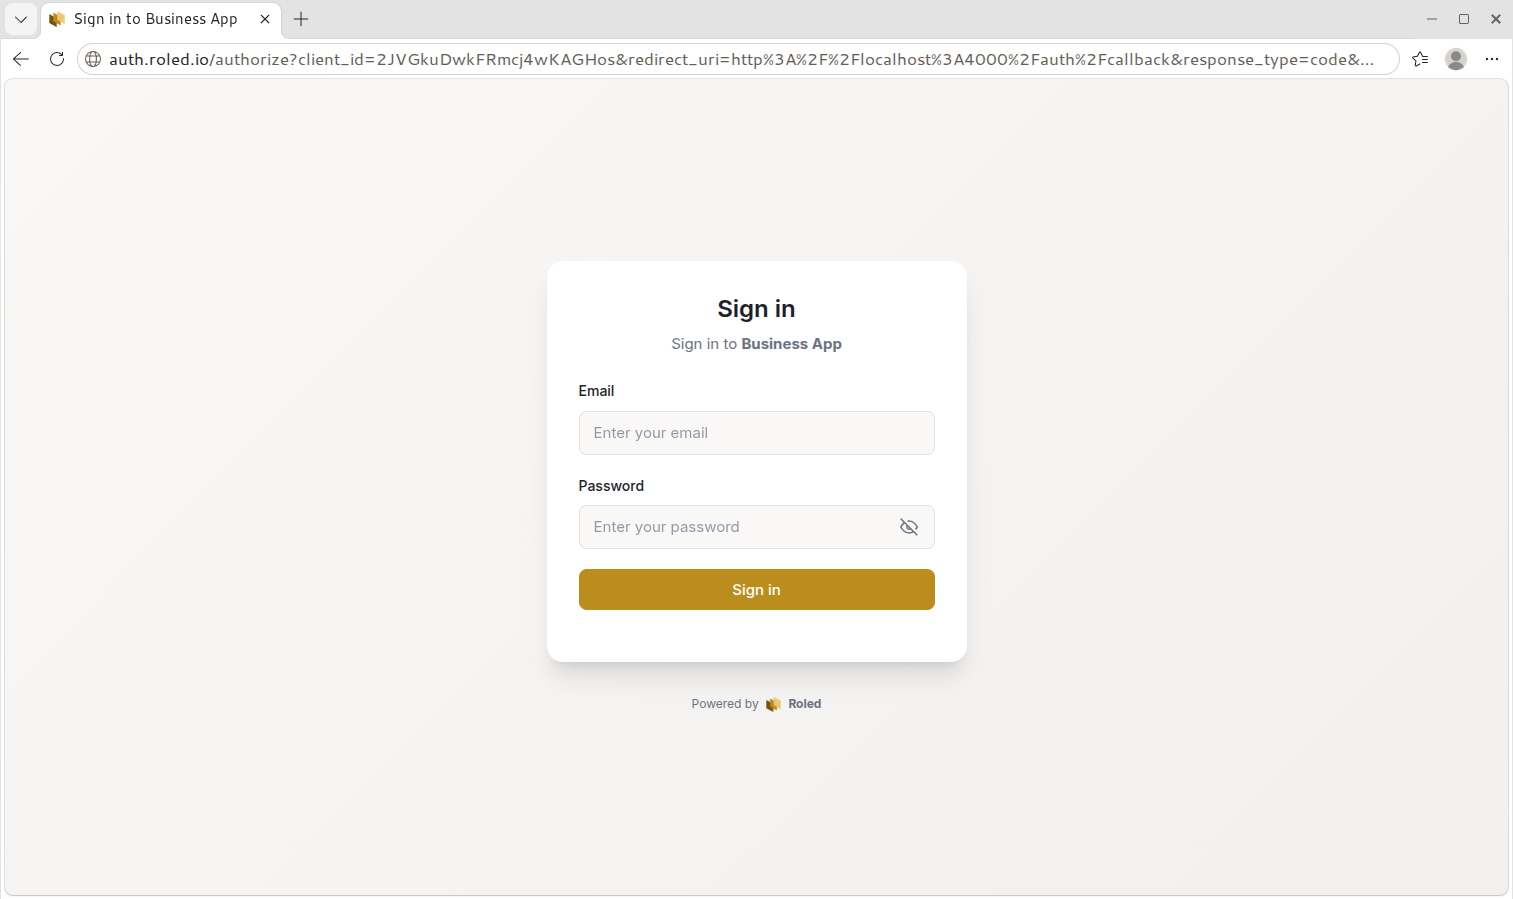
Users see Roled’s hosted login page:
After successful authentication, Roled redirects back with an authorization code:
http://localhost:4000/auth/callback
  ?code=6qxJpdxpyuAoSpfzkEbJUpJvBoncYM3Cnxfmj4WznZty78YpMd7VSZ7mE4KZTAH3
  &state=xcoiv98y2kd22vusuye3kch
3. Exchange authorization code for tokens
Exchange the authorization code for access and refresh tokens using the Exchange Credentials endpoint. You can implement this on your backend (recommended for security) or client-side (suitable for SPAs).
Option A: Backend exchange (recommended)
Use Node.js with Express:
import express from 'express';

const app = express();
const CLIENT_ID = '2JVGkuDwkFRmcj4wKAGHos'; // from Roled Console
const REDIRECT_URI = 'http://localhost:4000/auth/callback';
const TOKEN_URL = 'https://auth.roled.io/api/v1/tokens';

app.get('/auth/callback', async (req, res) => {
  const { code, state } = req.query;

  // Validate state and retrieve code_verifier from the session
  const savedState = req.session.roled_oauth_state;
  const codeVerifier = req.session.roled_code_verifier;

  if (!code || state !== savedState || !codeVerifier) {
    return res.status(400).send('Invalid OAuth callback');
  }

  const body = new URLSearchParams({
    grant_type: 'authorization_code',
    client_id: CLIENT_ID,
    authorization_code: code,
    redirect_uri: REDIRECT_URI,
    code_verifier: codeVerifier,
  });

  const response = await fetch(TOKEN_URL, {
    method: 'POST',
    headers: { 'Content-Type': 'application/x-www-form-urlencoded' },
    body: body.toString(),
  });

  const result = await response.json();

  if (!result.success) {
    return res.status(400).json(result.error);
  }

  const { access_token, refresh_token } = result.data;

  // Store tokens in a secure, httpOnly session cookie
  req.session.accessToken = access_token;
  req.session.refreshToken = refresh_token;

  res.redirect('/dashboard');
});
Option B: Client-side exchange (SPA-friendly)
For single-page applications without a backend, handle the token exchange in the browser:
const ROLED_AUTH_URL = 'https://auth.roled.io/authorize';
const CLIENT_ID = '2JVGkuDwkFRmcj4wKAGHos'; // from Roled Console
const REDIRECT_URI = 'http://localhost:4000/auth/callback';
const TOKEN_URL = 'https://auth.roled.io/api/v1/tokens';

async function handleCallback() {
  const params = new URLSearchParams(window.location.search);
  const code = params.get('code');
  const state = params.get('state');

  // Retrieve stored values from sessionStorage
  const savedState = sessionStorage.getItem('roled_oauth_state');
  const codeVerifier = sessionStorage.getItem('roled_code_verifier');

  if (!code || state !== savedState || !codeVerifier) {
    console.error('Invalid OAuth callback');
    return;
  }

  const body = new URLSearchParams({
    grant_type: 'authorization_code',
    client_id: CLIENT_ID,
    authorization_code: code,
    redirect_uri: REDIRECT_URI,
    code_verifier: codeVerifier,
  });

  const response = await fetch(TOKEN_URL, {
    method: 'POST',
    headers: { 'Content-Type': 'application/x-www-form-urlencoded' },
    body: body.toString(),
  });

  const result = await response.json();

  if (!result.success) {
    console.error('Token exchange failed:', result.error);
    return;
  }

  const { access_token, refresh_token } = result.data;

  // Store tokens (note: localStorage is less secure)
  localStorage.setItem('roled_access_token', access_token);
  localStorage.setItem('roled_refresh_token', refresh_token);

  // Clean up
  sessionStorage.removeItem('roled_code_verifier');
  sessionStorage.removeItem('roled_oauth_state');

  // Redirect to dashboard
  window.location.href = '/dashboard';
}

// Call this on page load if the callback page detects the URL has a code
if (new URLSearchParams(window.location.search).get('code')) {
  handleCallback();
}
4. Use the access token
Include the access token in the Authorization header when calling protected endpoints.
You can use the Inspect Current Access Token or Get Current User Details endpoints to retrieve the current user’s details, including roles and permissions. Use the response to enforce permissions in your app, like showing different content/page/menu/feature based on user roles or permissions.
const accessToken = localStorage.getItem('roled_access_token');
// or get from session cookie if using backend

// inspect current token details
const response = await fetch('https://auth.roled.io/api/v1/tokens/current', {
  headers: {
    Authorization: `Bearer ${accessToken}`,
  },
});

const { data } = await response.json();
// data.user.display_name   → "Alice Smith"
// data.user.email          → "alice.smith@example.com"
// data.role.name           → "Store Manager"
// data.permissions         → ["products:create", "products:read", ...]
On the server side, you can use a middleware to enforce permissions.
// Middleware example (Node.js/Express) with simple in-memory caching
const permissionCache = new Map();
const CACHE_TTL = 5 * 60 * 1000; // 5 minutes

async function getUserPermissions(accessToken) {
  const response = await fetch('https://auth.roled.io/api/v1/users/current?include_permissions=true', {
    headers: {
      Authorization: `Bearer ${accessToken}`,
    },
  });

  const result = await response.json();
  if (!result.success) {
    throw new Error('Invalid or expired token');
  }

  return {
    displayName: result.data.display_name,
    email: result.data.email,
    roleName: result.data.role_name,
    permissions: result.data.permissions || [],
  };
}

async function getPermissionsWithCache(accessToken) {
  const cached = permissionCache.get(accessToken);
  const now = Date.now();

  if (cached && (now - cached.timestamp) < CACHE_TTL) {
    return cached.data;
  }

  const permissions = await getUserPermissions(accessToken);

  permissionCache.set(accessToken, {
    data: permissions,
    timestamp: now,
  });

  return permissions;
}

function requirePermission(requiredPermission) {
  return async (req, res, next) => {
    try {
      const accessToken = req.session.accessToken;
      if (!accessToken) {
        return res.status(401).json({ error: 'Unauthorized' });
      }

      const { permissions, roleName } = await getPermissionsWithCache(accessToken);

      if (!permissions.includes(requiredPermission)) {
        return res.status(403).json({
          error: 'Forbidden',
          message: `Permission '${requiredPermission}' required for role '${roleName}'`,
        });
      }

      req.userPermissions = permissions;
      req.userRole = roleName;
      next();
    } catch (error) {
      res.status(500).json({ error: 'Authorization failed' });
    }
  };
}

// Protected endpoint example
app.get('/products', requirePermission('products:read'), async (req, res) => {
  // Only users with products:read permission reach here
  const products = await db.getProducts();
  res.json({ products });
});

app.delete('/products/:id', requirePermission('products:delete'), async (req, res) => {
  // Only users with products:delete permission reach here
  const { id } = req.params;
  await db.deleteProduct(id);
  res.json({ success: true });
});5. Refresh access tokens
Access tokens expire after 1 hour. Use the refresh token to obtain a new access token without requiring user re-authentication. This maintains seamless user experience while preserving security.
Call the Exchange Credentials endpoint withrefresh_token as the grant type.
const CLIENT_ID = '2JVGkuDwkFRmcj4wKAGHos'; // from Roled Console
const TOKEN_URL = 'https://auth.roled.io/api/v1/tokens';

async function refreshAccessToken() {
  const refreshToken = localStorage.getItem('roled_refresh_token');
  if (!refreshToken) {
    throw new Error('No refresh token available');
  }

  const body = new URLSearchParams({
    grant_type: 'refresh_token',
    client_id: CLIENT_ID,
    refresh_token: refreshToken,
  });

  const response = await fetch(TOKEN_URL, {
    method: 'POST',
    headers: { 'Content-Type': 'application/x-www-form-urlencoded' },
    body: body.toString(),
  });

  const result = await response.json();

  if (!result.success) {
    throw new Error('Token refresh failed');
  }

  const { access_token, refresh_token } = result.data;

  // Store new tokens
  localStorage.setItem('roled_access_token', access_token);
  localStorage.setItem('roled_refresh_token', refresh_token);

  return access_token;
}6. Implement secure logout
Secure logout requires revoking tokens server-side. Roled’s revocation endpoint immediately invalidates tokens, ensuring they cannot access protected resources.
Call the Revoke Current Access Token endpoint to invalidate both the access and refresh tokens:
const REVOKE_URL = 'https://auth.roled.io/api/v1/tokens/current/revoke';

async function logout() {
  const refreshToken = localStorage.getItem('roled_refresh_token');
  const accessToken = localStorage.getItem('roled_access_token');
  const clientId = '2JVGkuDwkFRmcj4wKAGHos'; // from Roled Console

  if (refreshToken) {
    try {
      // Revoke the token on the server
      await fetch(REVOKE_URL, {
        method: 'POST',
        headers: {
          'Content-Type': 'application/json',
          'Authorization': `Bearer ${accessToken}`,
        },
        body: JSON.stringify({
          client_id: clientId,
          refresh_token: refreshToken,
        }),
      });
    } catch (error) {
      console.error('Token revocation failed:', error);
      // Continue with local cleanup even if server revocation fails
    }
  }

  // Clear tokens from localStorage
  localStorage.removeItem('roled_access_token');
  localStorage.removeItem('roled_refresh_token');

  // Clear any sessionStorage items used during OAuth flow
  sessionStorage.removeItem('roled_code_verifier');
  sessionStorage.removeItem('roled_oauth_state');

  // Redirect to login page or home
  window.location.href = '/login';
}

// Attach to logout button
document.getElementById('logout-button').addEventListener('click', logout);Backend logout implementation
If you’re managing sessions on the backend, implement logout as follows:
// Express.js backend logout endpoint
app.post('/auth/logout', async (req, res) => {
  try {
    const refreshToken = req.session.refreshToken;
    const accessToken = req.session.accessToken;

    if (refreshToken) {
      // Revoke token on Roled server
      await fetch('https://auth.roled.io/api/v1/tokens/current/revoke', {
        method: 'POST',
        headers: {
          'Content-Type': 'application/json',
          'Authorization': `Bearer ${accessToken}`,
        },
        body: JSON.stringify({
          client_id: '2JVGkuDwkFRmcj4wKAGHos', // from Roled Console
          refresh_token: refreshToken,
        }),
      });
    }
  } catch (error) {
    console.error('Token revocation error:', error);
    // Continue with session destruction even if revocation fails
  }

  // Destroy session
  req.session.destroy((err) => {
    if (err) {
      console.error('Session destruction error:', err);
      return res.status(500).json({ error: 'Logout failed' });
    }

    // Clear session cookie
    res.clearCookie('connect.sid');
    res.json({ success: true, message: 'Logged out successfully' });
  });
});
Next steps
You’ve successfully integrated Roled authentication! Here’s what to explore next:
- Decoupled Users: Use your own authentication system instead of Roled Auth. See Decoupled Users.
- OAuth 2.0 — detailed OAuth flow explanation
- Authentication — token validation patterns
- API Reference — full token endpoint documentation